📌简易的安卓天气app(一)——解析Json数据、数据类封装
✅简易的安卓天气app(二)——适配器、每小时数据展示
✅简易的安卓天气app(三)——城市管理、数据库操作
✅简易的安卓天气app(四)——搜索城市、完善页面
简述
不罗嗦那么多没用的;;;
既然是简易的天气app,那么本demo就没有那麽多复杂的交互,页面跳转,只包括了针对api获取和解析数据放到app主页面,由于配置定位服务太繁琐,本次测试没有使用定位功能。
项目只包含一个主要activity_main.xml,两个封装的实体用来存数据
用到的天气api可前往官网注册账号获取:天气api
例如我这里注册好了我的账号,进入主页面得到下图的appid和appsecret
 然后把这两个东西复制粘贴到下面的api中
==注意==:
>
慎用此接口,每天有免费使用==上限==(如果你不想充钱)
地址栏搜索默认是当前所在城市,若是指定城市url后面加上&city=城市名,就行
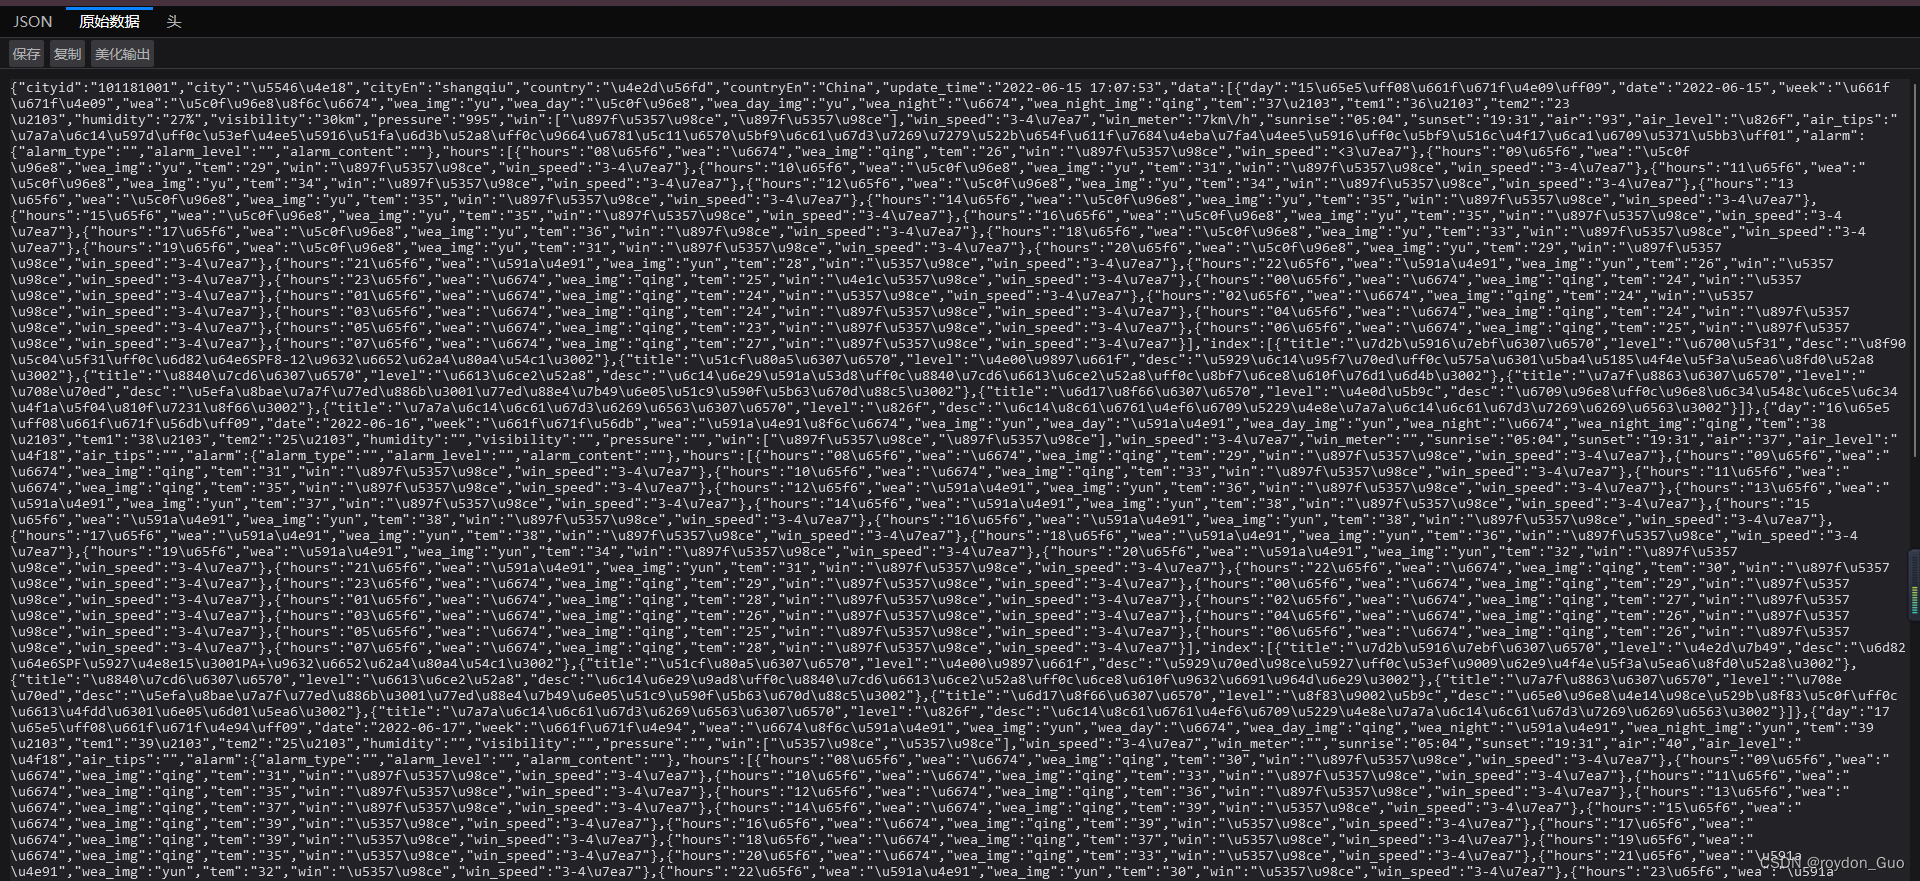
接着,访问此url结果如图,一长串的json数据
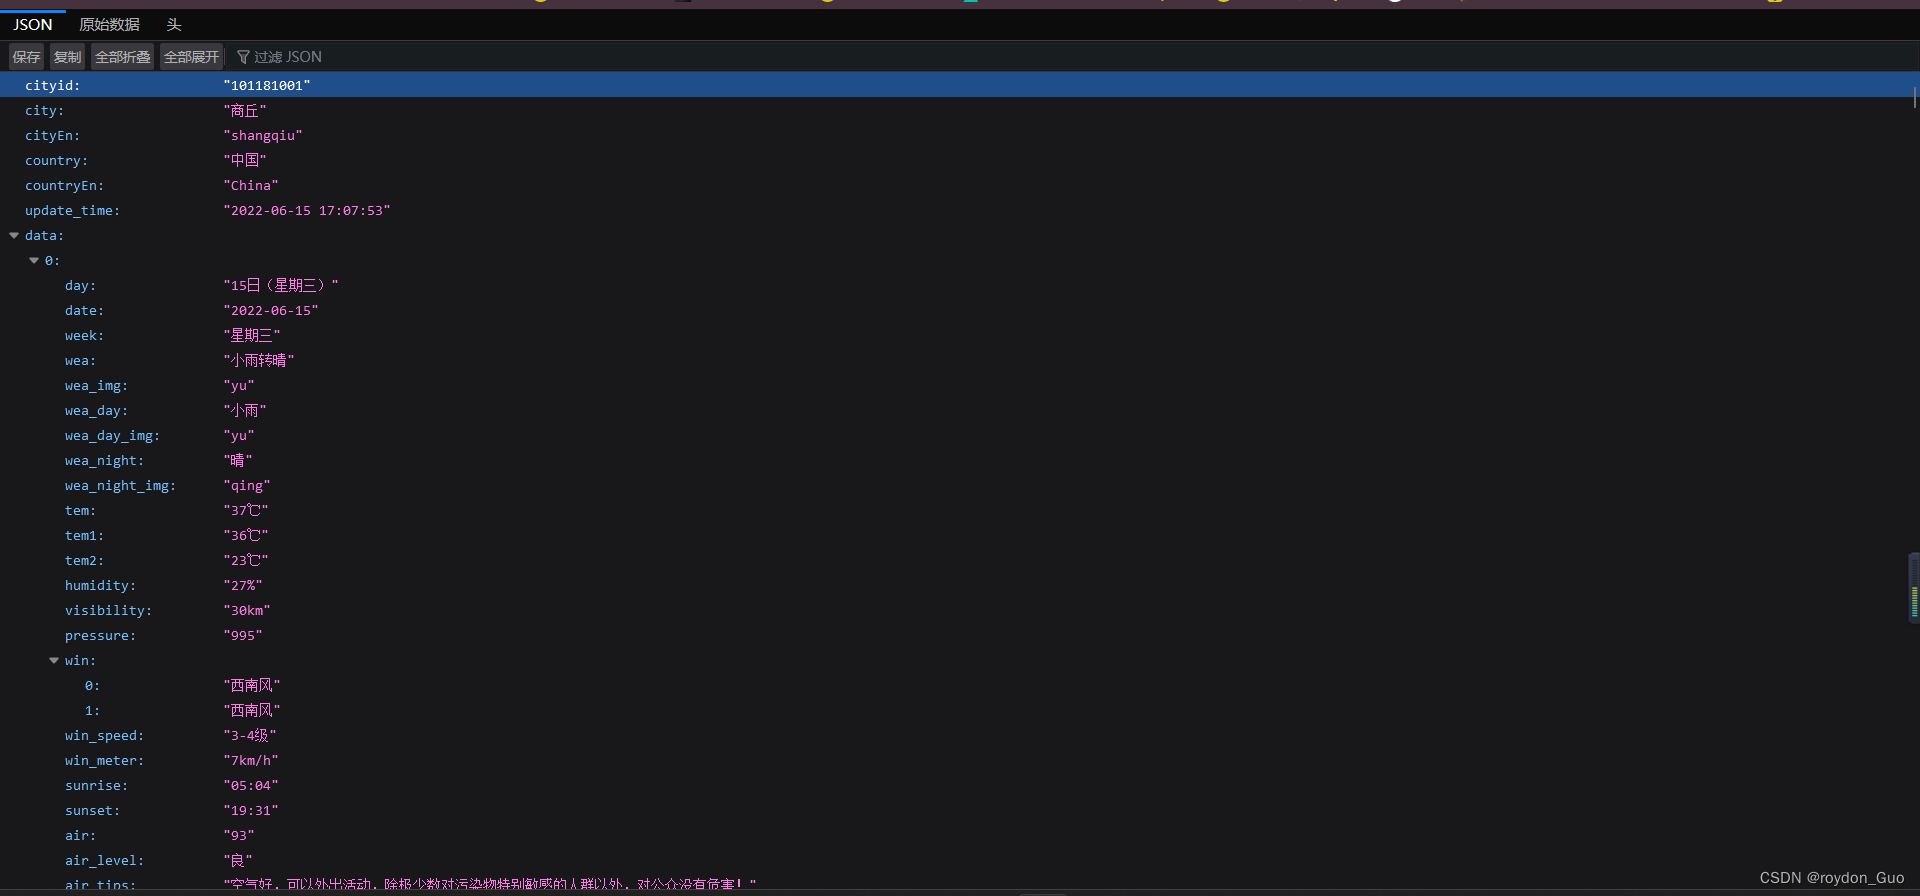
 如果你的浏览器支持转为json格式,那么会得到更清晰的数据格式,方便后续对其进行封装,也可百度在线json格式化工具,复制原始数据进去,得到格式化jsn数据
 观察上图json数据,里面的嵌套关系决定了我们封装一个实体类肯定不能拿到全部信息,因为上图data,是一个json数组(JsonArray),里面包含了今天加上未来六天共七天的天气数据(JsonObject),所以data要单独封装成一个实体叫做DayWeatherBean,用来接受每天的数据。
项目结构

api请求工具包
那么既然是请求api解析数据,自然离不开HttpUrlConnection,如果学的不是HttpUrlConnection请自行根据更改。
首先封装一个工具包,表示根据指定地址网络请求得到数据,得到的是string字符串,实是json数据
1
2
3
4
5
6
7
8
9
10
11
12
13
14
15
16
17
18
19
20
21
22
23
24
25
26
27
28
29
30
31
32
33
34
35
36
37
38
39
40
41
42
43
44
45
46
47
48
49
50
51
52
53
54
55
56
57
58
59
60
61
| import java.io.BufferedReader;
import java.io.IOException;
import java.io.InputStream;
import java.io.InputStreamReader;
import java.net.HttpURLConnection;
import java.net.URL;
public class NetworkUtil {
public static final String URL_WEATHER = "https://tianqiapi.com/api?version=v1&appid=(你的appid)&appsecret=(你的appsecret)";
public static String getWeather() {
String result = "";
HttpURLConnection connection = null;
InputStreamReader inputStreamReader = null;
BufferedReader bufferedReader = null;
try {
URL urL = new URL(URL_WEATHER);
connection = (HttpURLConnection) urL.openConnection();
connection.setRequestMethod("GET");
connection.setConnectTimeout(5000);
connection.setReadTimeout(5000);
InputStream inputStream = connection.getInputStream();
inputStreamReader = new InputStreamReader(inputStream);
bufferedReader = new BufferedReader(inputStreamReader);
StringBuilder stringBuilder = new StringBuilder();
String line = "";
while ((line = bufferedReader.readLine()) != null) {
stringBuilder.append(line);
}
result = stringBuilder.toString();
} catch (Exception e) {
e.printStackTrace();
}finally {
if (connection != null) {
connection.disconnect();
}
if (inputStreamReader != null) {
try {
inputStreamReader.close();
} catch (IOException e) {
e.printStackTrace();
}
}
if (bufferedReader != null) {
try {
bufferedReader.close();
} catch (IOException e) {
e.printStackTrace();
}
}
}
return result;
}
|
既然是网络请求,注意
>
AndroidManifest中别忘了加
<uses-permission android:name="android.permission.INTERNET" />

布局文件
接着就是布局,随意,怎么好看怎么来,无非就是接受几个数据传给TextView
1
2
3
4
5
6
7
8
9
10
11
12
13
14
15
16
17
18
19
20
21
22
23
24
25
26
27
28
29
30
31
32
33
34
35
36
37
38
39
40
41
42
43
44
45
46
47
48
49
50
51
52
53
54
55
56
57
58
59
60
61
62
63
64
65
66
67
68
69
70
71
72
73
74
75
76
77
78
79
80
81
82
83
84
85
86
87
88
89
90
91
92
93
94
95
96
97
98
99
100
101
102
103
104
105
106
107
108
109
110
111
112
113
114
115
116
117
118
119
120
121
122
123
124
| <?xml version="1.0" encoding="utf-8"?>
<LinearLayout xmlns:android="http://schemas.android.com/apk/res/android"
xmlns:app="http://schemas.android.com/apk/res-auto"
xmlns:tools="http://schemas.android.com/tools"
android:layout_width="match_parent"
android:layout_height="match_parent"
android:alpha="0.8"
android:background="@mipmap/bg"
android:gravity="center_horizontal"
android:orientation="vertical"
tools:context=".MainActivity">
<TextView
android:layout_width="match_parent"
android:layout_height="wrap_content"
android:text="郑州"
android:textSize="25sp"
android:layout_gravity="center"
android:gravity="center"
android:textColor="@color/white"
android:id="@+id/tv_city"/>
<ImageView
android:id="@+id/iv_weather"
android:layout_width="125dp"
android:layout_height="95dp"
android:src="@drawable/weather_yin" />
<TextView
android:id="@+id/tv_weather"
android:layout_width="wrap_content"
android:layout_height="wrap_content"
android:text="阴转多云"
android:textColor="@color/white"
android:textSize="20sp" />
<TextView
android:id="@+id/tv_week"
android:layout_width="wrap_content"
android:layout_height="wrap_content"
android:text="星期二"
android:textColor="@color/white"
android:textSize="16sp" />
<TextView
android:id="@+id/tv_tem"
android:layout_width="wrap_content"
android:layout_height="wrap_content"
android:text="31°C"
android:textColor="@color/white"
android:textSize="100sp" />
<TextView
android:id="@+id/tv_tem_low_high"
android:layout_width="wrap_content"
android:layout_height="wrap_content"
android:text="25°C/33°C"
android:textColor="@color/white"
android:textSize="20sp" />
<TextView
android:id="@+id/tv_time"
android:layout_width="wrap_content"
android:layout_height="wrap_content"
android:text="更新时间:2022-06-15 08:22:23"
android:textColor="@color/white"
android:textSize="17sp" />
<LinearLayout
android:layout_width="match_parent"
android:layout_height="wrap_content"
android:layout_marginLeft="10dp"
android:layout_marginRight="10dp"
android:alpha="0.7"
android:background="@drawable/blackground"
android:orientation="horizontal"
>
<LinearLayout
android:layout_width="120dp"
android:layout_height="wrap_content"
android:layout_gravity="center"
android:layout_marginLeft="5dp"
android:gravity="center"
android:orientation="vertical">
<ImageView
android:layout_width="105dp"
android:layout_height="65dp"
android:src="@drawable/fengli" />
<TextView
android:id="@+id/tv_win"
android:layout_width="wrap_content"
android:layout_height="wrap_content"
android:text="南风3~4级"
android:textColor="@color/white"
android:textSize="16sp" />
</LinearLayout>
<LinearLayout
android:layout_width="match_parent"
android:layout_height="wrap_content"
android:layout_marginRight="10dp"
android:layout_marginLeft="10dp"
android:orientation="horizontal">
<TextView
android:id="@+id/tv_air"
android:layout_width="match_parent"
android:layout_height="wrap_content"
android:layout_marginTop="5dp"
android:gravity="center"
android:text="空气:43 | 优\n空气好,适宜外出"
android:textColor="@color/white"
android:textSize="18sp" />
</LinearLayout>
</LinearLayout>
</LinearLayout>
|
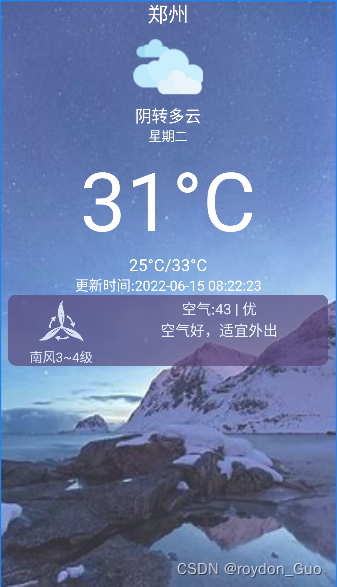
效果图(上图有个阴转多云图,下方有源码,可自行了解,此次只拿数据传数据,不包括图片)

实体类
两个实体类

一个WeatherBean是最上层json封装,一个是DayWeatherBean封装的data(前面已经解答过)
WeatherBean
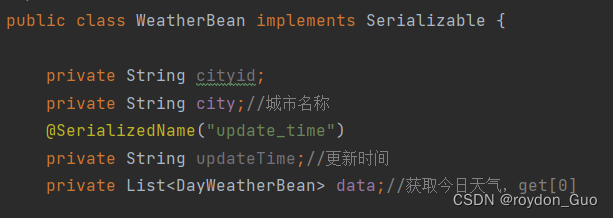
没什么好说的,就下面几个属性,学爬虫的应该更了解

其他的属性String就行,挑重要信息拿,data就是··List<DayWeatherBean>
此处命名不规范问题,由于使用的是Gson包封装,所以有一个实现类可用
public class WeatherBean implements Serializable
每个属性再加上序列化注解指定原始数据,就可解决,自行补充

1
2
3
4
5
6
7
8
9
10
11
12
13
14
15
16
| import java.util.List;
public class WeatherBean {
private String cityid;
private String city;
private String update_time;
private List<DayWeatherBean> data;
}
|
DayWeatherBean
接着根据api中data中的属性名选择性封装DayWeatherBean
1
2
3
4
5
6
7
8
9
10
11
12
13
14
15
16
17
18
19
20
21
22
23
24
| import java.util.Arrays;
public class DayWeatherBean {
private String wea;
private String wea_img;
private String week;
private String tem;
private String tem2;
private String tem1;
private String[] win;
private String win_speed;
private String air;
private String air_level;
private String air_tips;
|
MainActivity
使用handler来异步处理
首先开辟一个子线程,拿到网页数据传给handler
1
2
3
4
5
6
7
8
9
10
11
12
13
14
15
16
| private void getWeather() {
new Thread(new Runnable() {
@Override
public void run() {
String weatherJson = NetworkUtil.getWeather();
Message message = Message.obtain();
message.what = 0;
message.obj = weatherJson;
mHandler.sendMessage(message);
}
}).start();
}
|
使用Gson序列化工具前别忘记添加依赖包
implementation 'com.google.code.gson:gson:2.8.5'

添加代码后别忘了构建一下,右上角点一下

1
2
3
4
5
6
7
8
9
10
11
12
13
14
15
16
17
18
19
20
21
22
23
24
25
26
27
28
29
30
31
32
33
34
| private Handler mHandler = new Handler(Looper.myLooper()) {
@Override
public void handleMessage(@NonNull Message msg) {
super.handleMessage(msg);
if (msg.what == 0) {
String weather = (String) msg.obj;
Log.d("Main", ">>>>>>原始数据--weather---" + weather);
if (TextUtils.isEmpty(weather)) {
Toast.makeText(MainActivity.this, "天气数据为空!", Toast.LENGTH_LONG).show();
return;
}
Gson gson = new Gson();
WeatherBean weatherBean = gson.fromJson(weather, WeatherBean.class);
if (weatherBean != null) {
Log.d("Main", ">>>>>>封装数据--weather---" + weatherBean.toString());
}
tvCity.setText(weatherBean.getCity());
tvTime.setText(weatherBean.getUpdate_time());
dayWeather = weatherBean.getData().get(0);
tvWeather.setText(dayWeather.getWea());
tvTem.setText(dayWeather.getTem());
tvTemLowHigh.setText(dayWeather.getTem2()+"/"+dayWeather.getTem1());
tvWeek.setText(dayWeather.getWeek());
tvWin.setText(dayWeather.getWin()[0]+dayWeather.getWin_speed());
tvAir.setText("空气:"+dayWeather.getAir()+" | "+dayWeather.getAir_level()+"\n"+dayWeather.getAir_tips());
ivWeather.setImageResource(WeatherImgUtil.getImgResOfWeather(dayWeather.getWea_img()));
}
}
};
|
查看是否获取到数据

==源码自取==:gitee

